Наша цель - обеспечить Вам самый быстрый доступ к руководству по эксплуатации устройства Hornet Car Security 570T . Пользуясь просмотром онлайн Вы можете быстро просмотреть содержание и перейти на страницу, на которой найдете решение своей проблемы с Hornet Car Security 570T .
Для Вашего удобства
Если просмотр руководства Hornet Car Security 570T непосредственно на этой странице для Вас неудобен, Вы можете воспользоваться двумя возможными решениями:
- Полноэкранный просмотр -, Чтобы удобно просматривать инструкцию (без скачивания на компьютер) Вы можете использовать режим полноэкранного просмотра. Чтобы запустить просмотр инструкции Hornet Car Security 570T на полном экране, используйте кнопку Полный экран .
- Скачивание на компьютер - Вы можете также скачать инструкцию Hornet Car Security 570T на свой компьютер и сохранить ее в своем архиве. Если ты все же не хотите занимать место на своем устройстве, Вы всегда можете скачать ее из ManualsBase.
Руководство по эксплуатации Hornet Car Security 570T
Advertisement
Advertisement
Печатная версия
Многие предпочитают читать документы не на экране, а в печатной версии. Опция распечатки инструкции также предусмотрена и Вы можете воспользоваться ею нажав на ссылку, находящуюся выше - Печатать инструкцию . Вам не обязательно печатать всю инструкцию Hornet Car Security 570T а только некоторые страницы. Берегите бумагу.
34.2g of weight, and custom color 7 LED light zones 16.8 million colors. Paired with the Viper Software, the V570 allows you to program up to 13 onboard macro buttons, set up custom gaming profiles, and adjust the mouse sensitivity to suit you.
i © 2005 Directed Electronics-all rights reserved l l i i m m i i t t e e d d l l i i f f e e t t i i m m e e c c o o n n s s u u m m e e r r w w a a r r r r a a n n t t y y F or a period of one calendar year fr om the date of purchase of this auto-security device, Dir ected Electronics pr omises to the ORIGINAL PUR CHASER to repair or r eplace [...]
Page 3: Hornet Car Security 570T
ii © 2005 Directed Electronics-all rights reserved T O THE MAXIMUM EXTENT ALLO WED BY LA W , ANY AND ALL W AR- RANTIES ARE EX CLUDED BY THE MANUF ACTURER AND EACH ENTITY P AR TICIP A TING IN THE STREAM OF COMMER CE THEREWITH. THIS EX CLUSION INCL UDES BUT IS NO T LIMITED T O THE EXCL USION OF ANY AND ALL W ARRANTY OF MER CHANT ABILIT Y AND/OR AN[...]
Page 4: Hornet Car Security 570T
1 © 2005 Directed Electronics-all rights reserved t t a a b b l l e e o o f f c c o o n n t t e e n n t t s s l l i i m m i i t t e e d d l l i i f f e e t t i i m m e e c c o o n n s s u u m m e e r r w w a a r r r r a a n n t t y y . . . . . . . . . . . . . . . . . . . . . . . . . . . . . . . . . . . . . . . . . . . . . . . . . . . . . . . . .[...]
Page 5: Hornet Car Security 570T
2 © 2005 Directed Electronics-all rights reserved w w h h a a t t i i s s i i n n c c l l u u d d e e d d ➤ Control M odule ➤ One 2-B utton T ransmitter ➤ 8-Pin M ain H/1 Harness ➤ 3-Pin D oor Lock Harness ➤ 6-Relay W ires ➤ Shutdo wn T oggle S witch ➤ H ood Pin S witch ➤ HF+ antenna receiv er i i m m p p o o r r t t a a n n t t [...]
Page 6: Hornet Car Security 570T
3 © 2005 Directed Electronics-all rights reserved your warranty Y our warranty registration must be completely filled out and returned within 10 days of pur chase. Y our product warranty will not be validated if your warranty r egistration is not returned. Please note that it is necessary to keep your proof of purchase. fcc/id notice This device[...]
Page 7: Hornet Car Security 570T
4 © 2005 Directed Electronics-all rights reserved 1. N ever operate the system in an enclosed or partially enclosed area without v entilation (such as a garage). 2. When parking in an enclosed or partially enclosed area or when having the vehicle serviced, the remote start system must be disabled using the toggle switch. 3. I t is the user"[...]
Page 8: Hornet Car Security 570T
5 © 2005 Directed Electronics-all rights reserved outlined in this product installation guide. If the v ehicle starts in gear , cease remote start operation immediately and consult with the Dealer to fix the problem immediately . ➤ After the remote start module has been installed, test the remote start module in accor dance with the Safety Che[...]
Page 9: Hornet Car Security 570T
6 © 2005 Directed Electronics-all rights reserved t t r r a a n n s s m m i i t t t t e e r r f f u u n n c c t t i i o o n n s s The receiv er uses a computer-based learn routine to learn the transmitter buttons. Button R R e e m m o o t t e e S S t t a a r r t t / / S S t t o o p p P ress the button twice to remote start the vehicle. P ress th[...]
Page 10: Hornet Car Security 570T
7 © 2005 Directed Electronics-all rights reserved Button P P i i t t S S t t o o p p P ress the button twice for Pit S top mode (with engine running). u u s s i i n n g g y y o o u u r r s s y y s s t t e e m m lock/unlock P ress the button to remotely lock or unlock y our vehicle. remote start P ress the button twice to remotely start your vehi[...]
Page 11: Hornet Car Security 570T
8 © 2005 Directed Electronics-all rights reserved W W h h e e n n y y o o u u a a r r e e r r e e a a d d y y t t o o d d r r i i v v e e t t h h e e v v e e h h i i c c l l e e: : 1. Insert the ignition key and turn it to the ON (not the ST AR T) position. 2. P ress the brake pedal. The remote start will shut down and the doors will lock 3 sec[...]
Page 12: Hornet Car Security 570T
9 © 2005 Directed Electronics-all rights reserved timer mode This feature allo ws you to r emotely start and r un your vehicle for 12-minutes every 3 hours (for a maximum of 6 star ts for cold weather conditions). This feature makes it possible to automati- cally warm up the engine and vehicle interior when temperatur es are extr emely cold. If [...]
Page 13: Hornet Car Security 570T
10 © 2005 Directed Electronics-all rights reserved ■ The brake pedal is pressed. ■ The hood is opened. ■ The shutdown toggle switch is put into the ON position. ■ P ress the and buttons twice simultaneously on the transmitter . p p i i t t s s t t o o p p m m o o d d e e This feature allo ws you to exit the car and leave the engine runni[...]
Page 14: Hornet Car Security 570T
11 © 2005 Directed Electronics-all rights reserved 6. Exit and lock the vehicle. U se the following procedur e to e e x x i i t t Pit S top Mode: 1. Enter the vehicle. 2. Place the key to ignition (not the crank or start position). 3. S tep on the brake (this causes the system to exit P it S top M ode). 4. Or press the button twice. The doors wi[...]
Page 15: Hornet Car Security 570T
12 © 2005 Directed Electronics-all rights reserved 2. K K e e y y . . T urn the ignition to the ON position. The parking lights will turn On. 3. P P r r o o g g r r a a m m M M o o d d e e . . P ress and hold the program button on the control module. The parking lights will flash Off and then back On to ackno wledge program mode. 4. P P r r o o [...]
Page 16: Hornet Car Security 570T
13 © 2005 Directed Electronics-all rights reserved g g l l o o s s s s a a r r y y o o f f t t e e r r m m s s Contr ol Module: The “brain ” of your system. U sually hidden under the dash area of the v ehicle. I t houses the microprocessor that monitors your vehicle and contr ols all system functions. T ransmitter: A hand-held, remote contr [...]
Page 17: Hornet Car Security 570T
14 © 2005 Directed Electronics-all rights reserved[...]
Page 18: Hornet Car Security 570T
C C u u t t a a l l o o n n g g d d o o t t t t e e d d l l i i n n e e a a n n d d f f o o l l d d f f o o r r a a q q u u i i c c k k a a n n d d e e a a s s y y r r e e f f e e r r e e n n c c e e t t o o k k e e e e p p i i n n y y o o u u r r p p u u r r s s e e o o r r w w a a l l l l e e t t . . ✂ ✂ Q Q U U I I C C K K R R E E F F E E R [...]
Page 19: Hornet Car Security 570T
The company behind this system is Dir ected Electr onics Since its inception, D irected E lectronics has had one purpose, to pro vide consumers with the finest vehicle security and car stereo pr oducts and accessories available. The r ecipient of nearly 100 patents and Inno vations A wards in the field of advanced electr onic technology , DIRECTED [...]
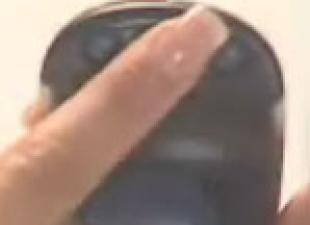
Пользователи привыкли, что мышки хорошие выпускают только именитые бренды вроде ASUS или Razer и относятся к гаджетам менее известных компаний с пренебрежением. Это не совсем правильно, ведь логотип на мышке еще не говорит о том, что она хорошая или плохая - всегда нужно смотреть на материалы, на качество сборки, на такие детали как программное обеспечение, начинка, компоненты. Например, мышка Patriot Viper V570 RGB Blackout Edition выглядит очень круто, у нее достаточно крытые компоненты в корпусе размещены, но вы о данном производителе, скорее всего, слышали не так много. Тем не менее, мышка очень крутая и сегодня я решил рассказать вам о ней, при том максимально детально, дабы даже продвинутый пользователь понял, за что мне так то устройство понравилось. Все же, гаджет действительно хорош, стоит не так дорого, а для тех, кто хочет получить максимум за свои деньги это вообще будет идеальный вариант.
Дизайн корпуса
Разработчики решили напичкать мышку таким количеством разного рода кнопок, что не сразу и понимаешь как этим всем пользоваться. Например, слева от основной панели, там где обычно на мышках расположена клавиша Взад и Вперед, разместили сразу пять клавиш - каждая может использоваться в играх или служить клавишей макроса, это все настраивается. Две дополнительных клавиши добавили и возле левой клавиши мыши, это будет немного сбивать с толку, когда вы только начнете пользоваться продуктом, но, со временем, придет понимание корпуса и тогда вы будете играть с комфортом. Опять же, эти две клавиши можно настраивать по своему усмотрению. Но и на этом разработчики не успокоились - снизу, под большим пальцем, расположена еще одна клавиша, она имеет номер 8, и она тоже выполняет свои функции! На верхней части корпуса имеются еще 9 и 10 - клавиши отвечают за DPI, но их тоже можно перепрограммировать.
Характеристики
Мышка построена на основе лазерного сенсора Avago ADNS-9800, который порадует вас максимальным разрешением DPI в 8000 единиц, можно за счет программного обеспечения повышать до 12000 DPI. Правда, кому такое нужно - не знаю. Сенсор отличный, его не срывает даже на разноцветных поверхностях и он отрабатывает просто шикарно в активных играх. Переключателями служат Omron со сроком службы в 10 миллионов нажатий, частота опроса 1000 Гц, имеется подсветка RGB. То есть, здесь прямо все нафаршировали под завязку.
Использование
Несмотря на то, что в интернете все говорят о том, что мышка идеальна для шутеров, я совершенно с этим мнением не согласен. Здесь на корпусе столько клавиш, которые будут отвлекать вас от стрельбы, что просто голова идет кругом. Конечно, все эти клавиши можно отключить в настройках, но зачем? Мышка создавалась для ММО игр, дабы вы настроили предметы или умения на нужные клавиши и пользовались ими в бою без использования клавиатуры, для Dota 2 это вообще сказочная возможность, можно все предметы из инвентаря назначить на кнопки и пользоваться максимально быстро.
Итог
Мышка даже грузики получила, которыми вы можете спокойно поднять вес продукта и тогда вам будет удобнее пользоваться устройством - целиться, наводить мышку на противника и так далее. Стоимость устройства составляет 70 долларов, это вполне приемлемая цена для гаджета с такой начинкой, RGB подсветкой и корпусом из качественного пластика. Так что да, я считаю, что мышка своих денег стоит и если вы захотите получить тот же набор возможностей от других компаний, более известных, то заплатить придется около 100 долларов, может даже больше. Смотрите, что вам более интересно.
Комментарии и отзывы Patriot Viper V570 RGB Blackout Edition
Благодаря оптимизации производительности с использованием искусственного интеллекта Galaxy A80 работает э...
Новинка получит АКБ ёмкостью 4000 мАч - как утверждает производитель, на одном полном заряде устройство с...
Смартфон оснащён аккумулятором ёмкостью 4000 мАч - по заявлению производителя, на одном заряде гаджет про...